Managing Contacts
A single account may have multiple contacts for the account. The two additional types of contacts (not including contacts for 2-factor authentication resets) are billing and technical. Additional contacts can also be used to add extra contact methods for the primary account holder.
You may choose whether additional contacts are able to log in or not. If they have a login, you may assign individual permissions for managing the account.
To add a contact, start by signing in. Select the “Contacts” link at the top:

This will bring up a page that allows you to add or edit contacts. If there are no contacts currently defined, it will automatically bring up the form to add a contact. There are three tabs related to adding or editing a contact:

-
Contact Information must minimally include a name and email address. All else is optional. You may use an email address already associated with the account if there is no additional email address to add.
-
Additional settings: This is where ‘Billing’ or ‘Technical’ is chosen.
-
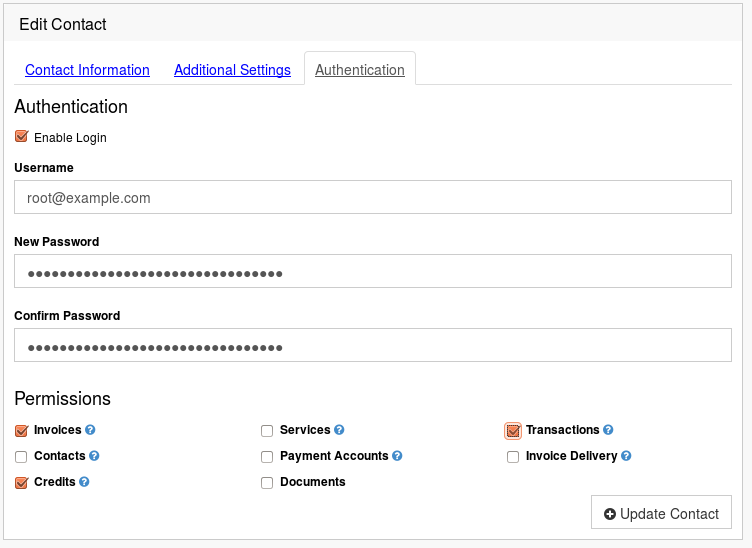
Authentication: If you want this contact to be able to log in, select “Enable login.” After this you will see a form resembling the following:

-
Username: This must be globally unique. For example, if a given email address is a technical contact on multiple accounts, you may wish to set up an email alias that is unique per account but that relays mail to a single mailbox.
-
Password: Some password must be assigned, but the contact will be able to send themselves a password reset email so it doesn’t need to be communicated to the contact over insecure channels.
-
Permissions: Different contacts logically have access to different settings. You can mouse over the question mark next to each permission for more information. The shown selected permissions is what we suggest for a billing contact. For a technical contact, the most likely permission you will want to give is for ‘Documents’ as this is used for abuse complaints and ssh key resets.
After the contact is successfully created, review each tab to confirm the settings are as intended. For example, if you get an error about adding the contact at some point, you may need to go back and select ‘enable login’ again.
If you are using 2-factor authentication, be sure that they add two-factor authentication as well. You will need to coordinate with them to minimize the amount of time between when their login is initially created and when they enable two-factor authentication. It is not possible to use the same token for both accounts. We will allow the primary account holder to reset the two-factor authentication for a contact.